Fluffernutter Cupcakes

14 Jun

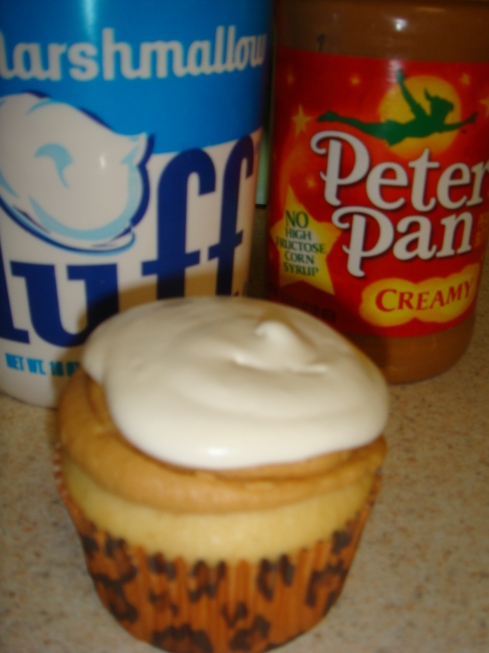
A fluffernutter is a sandwich comprised of: two slices of soft white bread, with creamy peanut butter and marshmallow fluff spread on generously.  Basically, it is ooey gooey goodness.  I honestly didn’t think fluffernutters needed an introduction, but several of my coworkers did not know what they were.  I was shocked, because I remember eating them when I was a kid, which is probably why I was am a fat kid… Thanks, mom.

The combination of peanut butter and marshmallow fluff is a perfect pairing.  I wanted to recreate this nostalgic sandwich in cupcake form.  Of course, I could have combined peanut butter into marshmallow fluff frosting, but I really wanted there to be a distinction between the two flavors.  Also, I used a boxed white cake, because I wanted a super fluffy soft cake to mimic the iconic white bread used in the sandwich version.  Made from scratch cake has a tendency to be quite dense in comparison to the boxed variety.   It’s probably all of those cancer-causing preservatives keeping it fluffy.

So here’s what you’ll need to frost 24 Cupcakes:

Marshmallow Fluff Frosting

  • 1 stick butter (softened)
  • 1 8oz jar of Marshmallow Fluff
  • 1 Cup Powdered sugar

Beat butter in your stand mixer until creamy. Add marshmallow fluff and vanilla, and beat until incorporated into butter.  Slowly (in batches) add powdered sugar, beat until sugar is completely incorporated into the frosting.

Peanut Butter Frosting

  • 1 stick butter (softened)
  • 1 ¼ cups creamy peanut butter
  • 2 cups confectioners’ sugar
  • 2 or 3 Tbsp milk (adjust for the consistency you want)

Beat butter and peanut butter in your stand mixer until incorporated. Slowly (in batches) add powdered sugar, beat until sugar is completely incorporated into the frosting.  Add milk, and mix until you get the desired consistency.

I wanted to frost the cupcakes using a multi-swirl technique like this: check out this informative blog entry on Good Life Eats.  However, I could not find my large star tip, and I was becoming impatient and frustrated trying to find it, so I just layered the two frostings.  I actually think it looks kind of cool.

Peanut Butter M&M Cookies

6 Jun

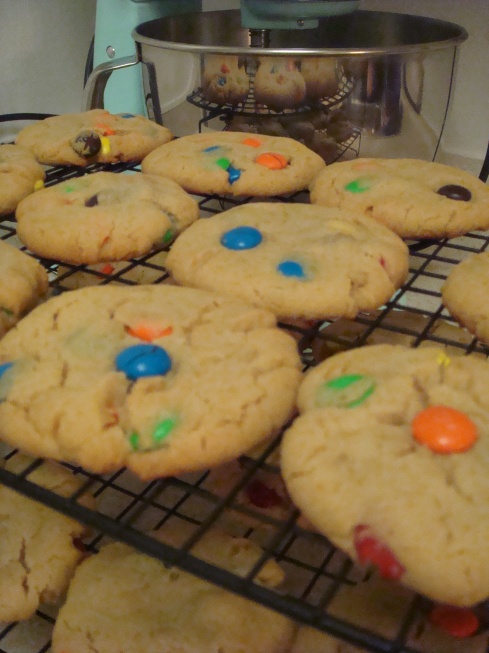
I was a baking fool today.  I made an awesome Summer Strawberry Cake and baked a big batch of cookies.  My boyfriend takes his lunch to work, so I try to add homemade goodies to his lunch box as often as I can.  At the grocery store today, we picked up a big bag of M&M’s that were destined to join a batch of peanut butter cookie dough.  I just adapted a standard peanut butter cookie recipe from allrecipes.com, and added M&M’s.  I used Crisco butter flavored shortening, because I had it, and I didn’t have any butter at room temperature when I wanted to make these, but feel free to use butter, or a combination of butter and shortening.

What You’ll Need:

  • 1 cup shortening (or butter)
  • 1 cup creamy peanut butter
  • 1 cup white sugar
  • 1 cup packed brown sugar
  • 2 eggs
  • 2 1/2 cups all-purpose flour
  • 1 teaspoon baking powder
  • 1/2 teaspoon salt
  • 1 1/2 teaspoons baking soda
  • 1 bag of M&M’s (I used a 14 oz bag)

Method:

  1. Cream together shortening, peanut butter and sugars in your stand mixer. Add eggs and mix until incorporated.
  2. In a separate bowl, sift together flour, baking powder, baking soda, and salt. Add flour mixture to the creamed butter in 3 batches.
  3. Stir in (by hand) the M&M’s.  If you use your mixer to do this, you’ll break up the M&M’s into a hot mess.
  4. Roll into 1 inch balls and put on baking sheets. Flatten each ball slightly with the palm of your hand. Bake in a preheated 350 degree oven for about 10 minutes or until cookies begin to brown. Do not over-bake.

Strawberry Summer Cake

5 Jun

My cake turned out just like I wanted... which doesn't always happen.

When I saw this recipe on Smitten Kitchen, I knew I had to make it.  I’m so glad I did.  It made my apartment smell amazing, and it was delicious!  You can find the recipe here.

Snickerdoodles (sans cream of tartar)

30 May

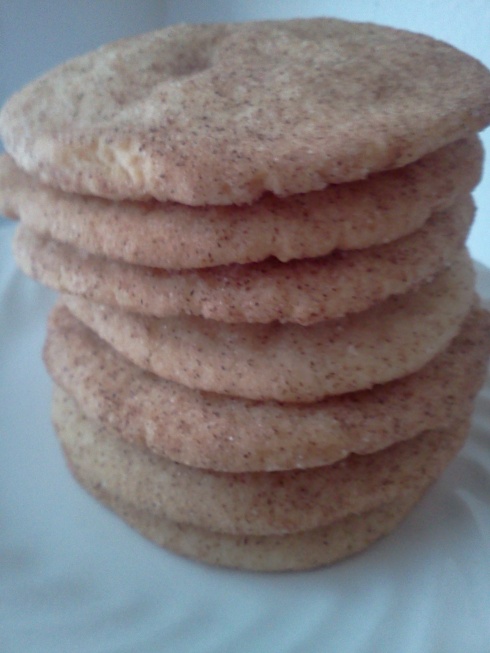
Snickerdoodles = (Sugar cookies + Cinnamon) = Amazing.   Yesterday I came across a blog I’ve never read before, and I saw a post for Snickerdoodles, which I LOVE.  They’re sooo easy and so delicious.  They might even be my favorite cookie of all time.  So, why haven’t I baked these in a while?  I don’t know, but I knew I had to get on it.  I never make them with cream of tartar.  I don’t even know why that’s an ingredient in these cookies, but I don’t care.  I like my cookies crisp, and this recipe from Martha Stewart delivers.  The more you press them down, the crispier they’ll be, if you like a chewier/softer cookie, don’t press them down at all.

Martha Stewart’s Snickerdoodles (Makes 4 dozen)

What You’ll Need:

  • 2 3/4 cups all-purpose flour
  • 2 teaspoons baking powder (NOT soda)
  • 1/4 teaspoon salt
  • 8 tablespoons (1 stick) unsalted butter
  • 1/2 cup pure vegetable shortening
  • 1 1/2 cups sugar
  • 2 large eggs
  • Cinnamon/Sugar Mixture: 2 teaspoons ground cinnamon, 2 tablespoons sugar (plus more if needed)

Method:

  1. Preheat the oven to 350 degrees, with one rack in top third and one rack in bottom third of oven. Line baking sheets with Silpat baking mats or parchment paper; set aside.
  2. Sift together flour, baking soda, and salt; set aside. In the bowl of an electric mixer fitted with a paddle attachment, combine butter, shortening, and 1 1/2 cups sugar. Beat on medium speed until light and fluffy, about 2 minutes. Scrape down sides of bowl. Add eggs, and beat to combine. Add dry ingredients, and beat to combine.
  3. In a small bowl, combine remaining 1/4 cup sugar and the ground cinnamon. Use a small (1 1/4-ounce) ice-cream scoop to form balls of the dough, and roll in cinnamon sugar. Place about 2 inches apart on the prepared baking sheets. Bake until the cookies are set in center and begin to crack (they will not brown), about 10 minutes, rotating the baking sheets after 5 minutes. Transfer the sheets to a wire rack to cool about 5 minutes before transferring the cookies to the rack. Store in an airtight container up to 1 week. (They won’t last that long.)

Not Yo’ Mama’s Banana Pudding

28 May

Just as the name suggests, this is definitely not yo’ mama’s banana pudding.  Banana pudding is good, sure.  There’s certainly nothing wrong with it.  However, there’s nothing spectacular about it.  Nilla wafers… eh… I could take them or leave them.  Leave it to Paula Deen to make a southern favorite even better and more fattening.  Isn’t she wonderful?  (I swear, I accidently just typed “butter” instead of “better.”  I’m channeling Paula as I write this.)

This dessert should come with a disclaimer:  Once you make this for family, friends, or co-workers, they will beg you to make it over and over again.  Luckily, it’s super-simple to make.  My boyfriend is the guy who brings bottled soda or plates to work pot-lucks.  While soda and plates are important, I couldn’t believe he wasn’t asking me to make something for him to bring.  So, a couple of years ago, I sent him with this banana pudding.  HUGE MISTAKE.  After that, I was making one every couple of months.  “I can make other things,” I’d say.  “I can give them the recipe,” I’d say.  But to no avail… they wanted the pudding.  Another possible issue with this recipe is the price of making it.  I can sometimes find Chessmen Cookies on sale for 2/$5.  Sometimes, I have to pay almost $3 each.  When visiting San Diego, I could not find the cookies cheaper than $4 each.  So, more than half your cost is in the cookies.  But, don’t skimp.  While you could find other cookies comparable in taste, the cookies have adorable little Chess pieces on them, which really add to the aesthetic of the dish.

While you risk being hounded to make this dessert for every occasion, this is better served at a party or barbeque.  You can NOT be trusted with a 13X9 of this banana pudding, if you’re stuck at home alone.  Sharing is caring.

Not Yo’ Mama’s Banana Pudding (recipe: Paula Deen)

What You’ll Need:

  • 2 bags Pepperidge Farm Chessmen cookies
  • 6 to 8 bananas, sliced
  • 2 cups milk
  • 1 (5-ounce) box instant French vanilla pudding
  • 1 (8-ounce) package cream cheese, softened
  • 1 (14-ounce) can sweetened condensed milk
  • 1 (12-ounce) container frozen whipped topping thawed, or equal amount sweetened whipped cream

Method:

Line the bottom of a 13 by 9 by 2-inch dish with 1 bag of cookies and layer bananas on top.

In a bowl, combine the milk and pudding mix and blend well using a handheld electric mixer. Using another bowl, combine the cream cheese and condensed milk together and mix until smooth. Fold the whipped topping into the cream cheese mixture. Add the cream cheese mixture to the pudding mixture and stir until well blended. Pour the mixture over the cookies and bananas and cover with the remaining cookies. Refrigerate until ready to serve.

Beer Bread

4 May

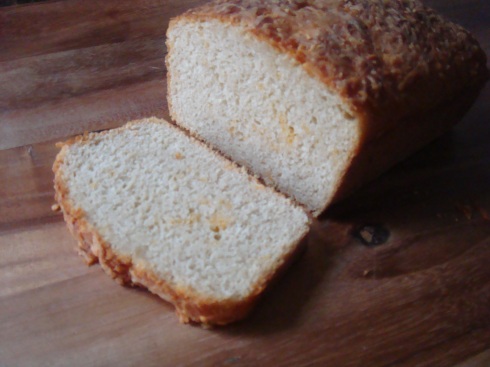
I found this recipe on My Baking Addiction last September.  I’m sure I’ve mentioned her blog a dozen times.  It is amazing.  Check it out.  I made this recipe when I first saw it last year, and we just loved it.  You only need one 12 oz beer to make it.  However, an extra beer in the fridge isn’t something we normally have (my fault).  Last weekend, I made a conscious decision to not drink my last beer so I could make this bread.  You can use any beer you want.  I used Zeigenbock, but whatever beer you have should be fine.

Beer Bread (My Baking Addiction)

yields | 1 loaf

Ingredients:

3 cups self-rising flour
1/3 cup sugar
1 teaspoon kosher salt
12 ounces beer
2 tablespoons melted butter

1 handful of cheddar cheese (optional)

Directions:
1. Preheat the oven to 375 degrees F.
2. Butter an 8×4 inch loaf pan and set aside. In a large bowl, combine the flour, sugar, salt and beer; mix well. The mixture will be sticky. Pour into the loaf pan and bake for about 55 minutes. (I also sprinkled a little cheese on top before I popped it into the oven.)
3. At the last three minutes of baking, remove from oven, brush the top of the loaf with the melted butter and return to oven for the final three minutes of baking.

Cherry Cheesecake Cups

1 May

I wanted to bake this weekend… but I ended up not having a lot of spare time.  So, I thought I’d still whip something up that’s quick and easy.  This recipe is adapted from a Nestle recipe that uses pre-made cookie dough as a crust.  I already had graham cracker crumbs, so I used that instead.  Though I’m sure these would be amazing with a cookie crust.  I wanted to top these with pecans, caramel, and chocolate (think, turtle cheesecake).  I made one with the turtle topping, but my boyfriend and I agreed it was too rich.  I didn’t want to go to the store tonight, but these definitely needed a sweet/tart topping.  So, I headed to the store, sans makeup (eek!) to get cherry pie filling.  It was the perfect topping.

What You’ll Need:

Crust:

  • 2 Cups Graham Cracker Crumbs
  • 1 Stick Butter
  • 2 TBS sugar

Filling:

  • 2 pkgs. (8 oz. each) cream cheese, room temperature
  • 1 can (14 oz.) Sweetened Condensed Milk
  • 2 large eggs
  • 2 teaspoons vanilla extract

Topping:

  • 1 can of Cherry Pie Filling

Method:

Preheat oven to 325° F. Line pan with 24 foil muffin cups.

Melt butter in a bowl, and then add graham cracker crumbs and sugar.  Mix thoroughly.

Spoon a teaspoon of the crust mixture in each muffin cup.  Press down mixture using your fingers.

Bake for 10 minutes.  Allow crusts to cool completely.

Beat cream cheese, sweetened condensed milk, eggs and vanilla extract in medium bowl until smooth. Pour about 3 tablespoons cream cheese mixture over prepared crusts in muffin liners.

Bake for additional 15 to 18 minutes or until set. Cool completely in pan on wire rack. Top each with level tablespoon of pie filling. Refrigerate for 1 hour.

Roasted Fingerling Potatoes and Maple Glazed Carrots

1 May

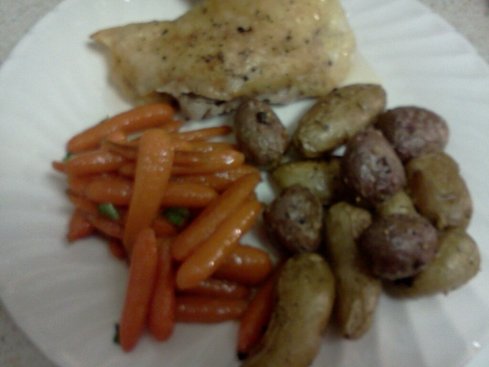
My photography sucks even more than usual. This was taken with my phone.

I love roasting chicken.  There’s only two of us, so there is always plenty of leftover chicken to use  for the rest of the week.  (I think these leftovers are destined for chicken enchiladas.)  I normally just make mashed potatoes as a side, but I bought some cool fingerling potatoes on sale and wanted to give them a try.  They were awesome!  The little purple ones were kind of scary, but they taste just like regular potatoes.  Crisp on the outside and perfectly tender and fluffy on the inside.  I tried to sneak another veggie into our meal, but with the butter and maple syrup, it kind of negates all the health benefits of the carrots.  🙂

What You Need:

  • 1 lb bag of baby carrots
  • ¼ C Maple Syrup (the real stuff)
  • ¼ C Butter
  • Kosher Salt to season
  • (optional parsley to garnish)

Method:

Combine carrots, syrup, butter, and salt in a sauce pan.  Bring to a boil over medium-high.  Cook for 15 minutes, until the sauce coats the carrots.

What You Need:

  • 2 lbs fingerling potatoes, scrubbed
  • 5-6 cloves of garlic, crushed
  • Olive Oil
  • Kosher Salt and Cracked Black Pepper to season

Method:

Preheat oven to 425 degrees.  Spread potatoes in an even layer on a baking sheet.  Drizzle liberally with olive oil.  Toss with garlic.  Season the potatoes with kosher salt and freshly cracked black pepper.  Put them in the oven for 25-30 minutes until cooked completely.

Filipino Chicken Adobo

28 Apr

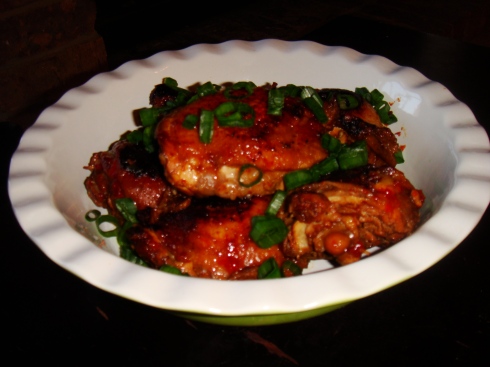
I only garnished with the onion, because I thought it looked too much like BBQ chicken in the photo. 😛

Ever surprised that you like something?  That is how I feel about this dish.  I’m not fond of vinegar.  I hate the smell.  I don’t even like anything that’s pickled, with the exception of nacho sliced jalapeños.  So, when I first had my boyfriend ask his mom how to make this dish, I was put off by the amount of vinegar involved.  But, for some reason, I like it.  It just works.  I’ve been making this for about a year now.  It is so simple to make.  While it’s a new dish for me, this is something my boyfriend ate growing up.  I love to give him a taste of nostalgia.  There’s nothing better than when the taste or smell of something connects you to the past.

What You Need:

  • 6 chicken thighs
  • 1/2 cup apple cider vinegar
  • 1/2 cup soy sauce
  • 4 cloves garlic, minced
  • 1 tsp. black peppercorns
  • 3 bay leaves

Method:

Combine all ingredients in a large pot. Cover and marinate chicken for 1-3 hours in the refrigerator.  I usually marinate overnight, but I didn’t plan ahead this time.  After marinating, bring to boil over high heat, then lower heat. Cover and let simmer for 30 minutes, stirring occasionally. Uncover and simmer until sauce is reduced and thickened, and chicken is tender, about 20 more minutes. Serve with steamed rice.

*Optional* The skin is not going to be crispy, but you can place the chicken skin-side down in a skillet with oil heated on medium-high.  Only cook long enough to crisp up the skin, because you don’t want to cook your chicken to death.  While you’re doing this, you can continue to reduce the remaining sauce in the pot.

Easy Granny Smith Apple Pie

21 Apr

This pie is… well, easy as pie.  I know that is cheesy, but that’s just me!

Anyway, my mom makes amazing apple pie.  Her ‘secrets’ are that she always uses Pilsbury crust (her excuse:  Why bother making homemade when the store-bought is just as good, and so easy?), and she always uses Granny Smith apples.  The combination of sweet and tart is amazing, and lends itself nicely to a huge scoop of vanilla ice cream.  Here’s the problem.  When you ask my mom for a recipe, she’s like, “Ohhh… sometimes I put 3/4 a Cup of sugar, sometimes I add a cup.  You could put some butter in there, but you don’t have to.  It just depends on what I have on hand.”  It isn’t that she’s trying to hide the recipe from me, it’s just that some things that she’s been making for years, she has never written down, and just wings it.

I think my mom makes it the best, but that’s because it’s always special when my mom bakes it, because it’s usually by request.  I made this pie for my friend’s birthday, and I wish I had made an extra one for myself.

Apple Pie

What You’ll Need:

  • 1 package Pilsbury refrigerated crusts
  • 6 or 7 Medium Granny Smith Apples (Peeled, Cored, and sliced *not too thinly!*)
  • 3/4 or 1 C of sugar (depending on how sweet you like it)
  • 1 tsp Cinnamon
  • 2-3 Tbsp Flour
  • 2 Tbsp Butter

Method:

Preheat oven to 425 degrees.

Press one crust into the bottom of your pie plate.  Some crust should be hanging over the sides, leave that alone.  Mix sugar, cinnamon, and flour together in a bowl.  Toss your sliced apples in the mixture.  Pour the apples into the pie plate.  Cut the butter into small cubes, and tuck evenly into spaces between your apples.  Place the top pie crust on top, be careful not to stretch it, and seal the edges with your fingers, or a fork.  Using a knife, make slits on top of the pie.  They can be decorative, but they don’t have to be.  Make sure they’re big enough, or too much steam will get trapped in your pie.  Now, this is important.  Cover the edges of your crust with foil until the last 15 minutes of cooking.  If not, they will get way too brown.

Bake for 45 minutes.